These days you need at least eigthy chargers and power adapters in the car to accomodate all the machinery needed. The one and only power socket in the E39 M5 is therefore not sufficient. Not to mention the socket is a regular cigarette lighter sitting at the bottom of the center console, so whenever you plug anything there, it looks horrible. Time to solve this issue.
There are some options.. You can of course buy an adapter providing double sockets and few USB ports. The variety on the market is endless. The only issue is you won’t get rid of the ugly cable dangling all across the interior and of course there is no easy placement for the power adapter itself. Having done some research I figured in the end, I was going to proceed with some electrical work. And because I’m an amateur, I picked the easiest options. The plan was to get a new power socket in the glovebox and hardwire cable for my camera by the top of the windshield.
Windshield 12V hardwire cable
I have bought a hardwire kit for the camera, meaning only cables with fuse and no power plug. The E39 offers several ways to get electricity – you can use the fusebox in the glovebox, you can also use the cables in the rear view mirror or the sun-roof motor cables. I wanted the hardwire to be active only with ignition on, so I picked the rear-view mirror cables.
Equipment needed:
- Electrical tester.
- Self cutting cable clips for slim wires (<1,5mm).
- Plastic pry tool or credit card.
- Hardwire cable set.
The process (15-20 minutes):
- Using your fingers or pry tool, pull out the headliner panel with sun-roof button and also the headliner light panel. Disconnect the cables.
- There is a plastic cover behind the rear-view mirror, sitting on the windshield. Use the pry tool or credit card to split two plastic pieces. It’s enough to push the credit card into the middle gap and wiggle a bit. The cover will split and fall off.
- There’s a connector hidden under the cover. Disconnect it.
- Use the tester to identify the lead (power) cable on the hardwire set. In my case, it was the one with the fuse. If you don’t have the fuse, mark the cable, so that you know which is the ground and live wire.
- Use the disconnected connector from the mirror to find the live cable from the car. Don’t forget to turn the ignition on. Based on the setup and hardwire kit, just try to plug the leading cable to any of the pins, while you have the second hardwire cable attached to the metal part of the body to get the ground. E39 has typically a large screw above the headliner panels, where you can attach the ground cable.
- (There is a possibly ground wire between all the cables but I didn’t look for it. I guess it’d be a brown one.)
- If I remember correctly, the live wire has green-yellow color combination.
- Now it’s time to setup the hardwire – take the plug end through the hole in the ceiling trim, where mirror cables go through. Set the lenght just right to get your device connected. On the other side, either shorten the cables or tie them together and place in a spot, where they won’t block anything or move or make any noises.
- Use the self-cutting clips to connect the live wire from the car with the live cable from the hardwire set. As said before, use the metal screw above the headliner to attach the ground.
- Connect your device to the cable and verify it’s working (= the power goes through the wires).
- Put back the mirror cover and push both ends together until it clicks back into position. The cover has to fit with no resistance, just fiddle around until you make it right.
- Connect the light module and put it back to the ceiling trim.
- Verify the new cable position before you connect and plug back the sun-roof button panel.
- Done.
Additional 12V power socket
So my camera hardwire was done here, I needed however additional power socket to charge my phone and other possible devices. My M5 has a built-in torch light in the glovebox, which is connected to the power to be able to charge its battery. I’ve decided to use this power source.
Equipment needed:
- External (dual) 12V power socket, either hardwire kit or a typical with 12V plug.
- Flat screwdriver.
- Electrical tester.
- Scissors.
- 2 pcs of self-cutting clips.
- 3M adhesive tape – both-sided
The process (<10 minutes):
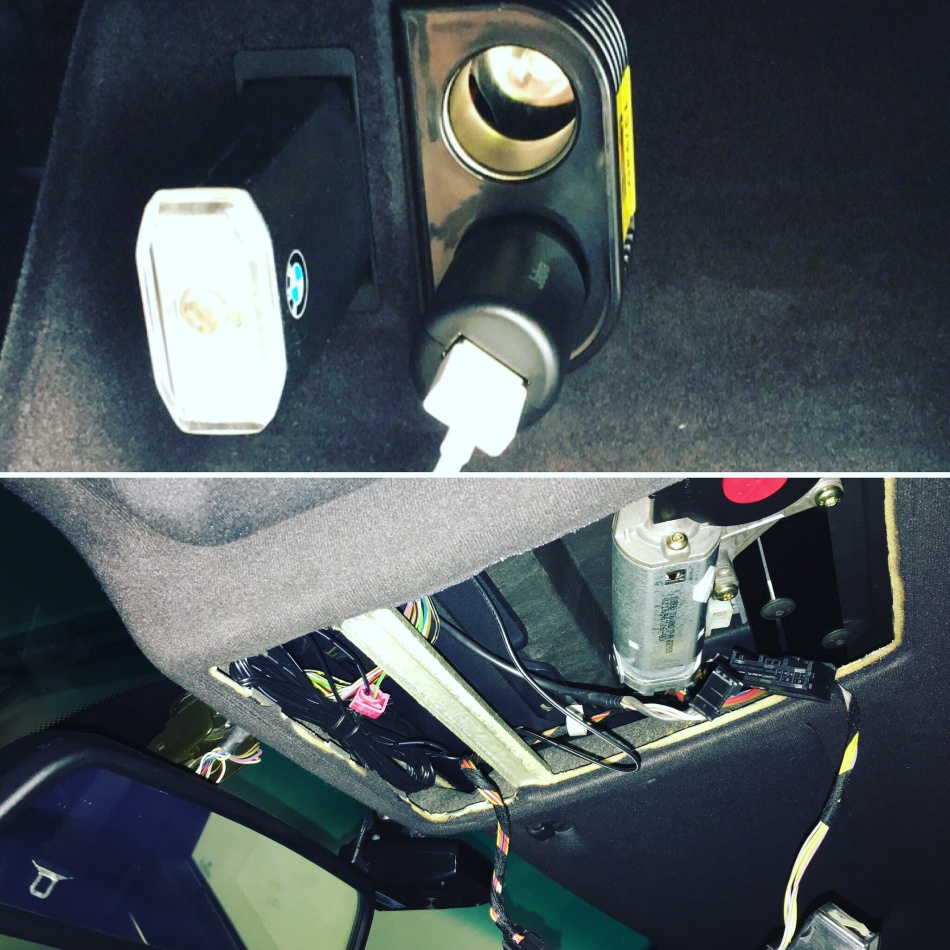
- Open the glovebox and pull out the torch light.
- The glovebox door is secured by two plastic strips, which are plugged onto a bolt and secured by a flat pins.
- Use the screwdriver to push the pins sideways and release the strips. The glovebox door will dive lower.
- By the inner side of the glovebox there are two bolts – these are the powersource for the torch light. Reach behind them and push the plastic item towards you. It will pop out.
- Turn the ingition on (not starting the engine) and use the tester to identify the lead pin and the ground pin, resp. cables behind them. Turn off the ignition.
- Now take your power socket you have purchased and if you have the one with a power plug, cut the plug off. You need just two wires to have it connected. Use the tester to identify lead and ground wire.
- It’s time to connect everything together. Take the wires from the socket and lead them through the torch light hole from the rear. The wires have to come to the plastic for the torch from behind.
- Use the self-cutting clips to connect the wires (lead with lead, ground to ground). Turn the ignition on and test the socket, if it’s providing power.
- Push the plastic part back to its place.
- Place the new power socket anywhere inside the glovebox. You can secure it with the adhesive tape.
- Put the plastic strips for the glovebox back into the place and use the flat pins to secure the position.
- Done.
The power socket in the glovebox is not perfect but provides the advantage of being invisible in the car. The charging cables are then slim enough to go through the glovebox/trim gap without damaging anything. On the upside, once you leave the vehicle, you can hide everything in the glovebox.
Once done, the result looks like this…
Sam
Brilliant, I will definitely have to copy the extra power sources in the glovebox!